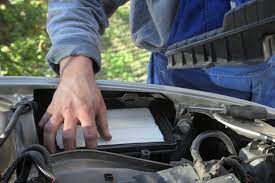
Russ teaches you how to replace an air filter in a car, using a 2020 GMC Terrain as an example
What You'll Need
- A Phillips screwdriver (preferably with some length to it)
- 7 mm socket with an extension and ratchet
1. Open the hood of your vehicle and identify the air cleaner
Identifying the air cleaner under the hood of your car is a straightforward process that typically involves locating a rectangular or cylindrical component situated near the engine. The air cleaner, also known as the air filter housing, is crucial for maintaining the quality of air entering the engine.
Start by opening the hood of your car and visually inspecting the engine compartment. Look for a plastic or metal casing with clips or screws securing it in place. The air cleaner is commonly connected to the engine via a duct or hose.
Additionally, check for any labels or markings indicating "air filter" or similar terms. If in doubt, consult your vehicle's owner's manual for guidance on the air cleaner's location and proper maintenance procedures. Regularly inspecting and replacing the air filter is essential for optimal engine performance and fuel efficiency.
2. Remove the Screws
To start you are going to loosen the four screws of the bottom housing of the air filter. Be careful not to lose the screws regardless if you take them out all the way or not.
3. Gently Lift the Cover and Remove the Old Filter
Once the screws are loose you are going to gently lift the cover and remove the old air filter, which should be visible as soon as you open it.
Clean any debris from the housing to prevent it from clogging your new air filter. If the debris is not cleaned out, it can also be sucked into the intake tube causing the check engine light to come on, due to a sensor being thrown out of whack.
4. Install Your New Air Filter
Identify your locating tab, which will line up with a slot on the bottom of the housing. Set the new filter in straight down with fibrous material face down. Replace the top cover back on the bottom housing, evenly tightening the screws on all sides.
Pro Tip: Make sure the screws look straight and start by tightening the screws diagonal from each other.
Depending on the type of vehicle; don't forget to reset your monitor.


